Tag Archives: vegetable gardening

Broccoli Gardening

Broccoli Gardening

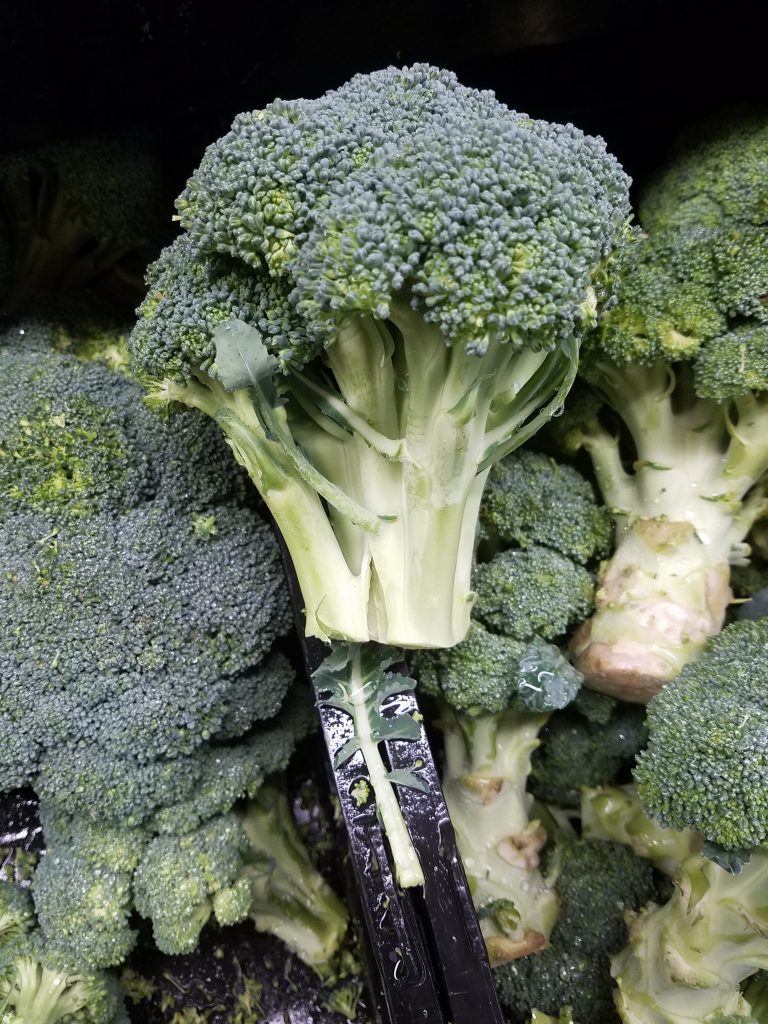
broccoli gardening Broccoli is a nutritious vegetable, high in dietary fibers, vitamins and minerals

Broccoli, Brassica oleracea var. Italica, belongs to the plant species Brassica oleracea, that also includes several other common cultivars including cabbage, Brussels sprout, kale, cauliflower, and collard greens. The short, thick-stemmed plant from the Brassicaceae family is native to eastern Mediterranean and Asia Minor. It’s a herbaceous annual plant grown for its edible flower heads. If you want to attempt broccoli gardening, you should know the plant grows to about 24 to 36 inches high with thick, branching leathery leaves, and dense clusters of flower heads, usually green in color. It’s a cool season vegetable that takes between 60 to 150 days for the heads to come to harvest, depending on the variety.

Types & Varieties of Broccoli

Broccoli is a nutritious vegetable, high in dietary fibers, vitamins and minerals. It’s an excellent source of potassium, folic acid, and Vitamins A, B and K. Though most superstores only sell a few standard types, there is a wide range of broccolis to grow and harvest for home gardeners.

Common Varieties of Broccoli:

BelstarThis hybrid variety produces 6-inch blue green heads that take about 65 days to reach maturity. Once the main crown is picked, the variety is also known for producing a series of side shoots for further harvests.

Blue Wind F1 – This is an extra early maturing variety, producing large dense heads that take about 60 days to mature. The side shoot production is also commendable.

Di Cicco – It’s an Italian heirloom variety that produces its initial crowns in as little as 50 days, followed by side shoots. The plants mature at different rates, making it an excellent choice for home gardeners, giving a consistent supply of broccolis to the kitchen.

Purple Sprouting Broccoli – With purple flower heads instead of the typical green broccolis, the variety is much sweeter than others. It matures slower than others and is typically planted as a biennial to harvest in the following spring. 

Broccoli yields 4 to 6 pounds from a 10-foot row. Space individual plants 18 to 24 inches apart, with a 3-feet spacing between rows and plan about 2 to 4 plants per person.

Temperature and Timing for Growing Broccoli

Broccoli is a cool-season crop that’s typically planted in late winters or early spring for harvesting in early summer. For broccoli gardening a second crop can be planted in late summers for a fall harvest. Broccolis grow best when the temperatures are between 40°F to 70°F. High temperatures negatively impact the development of the heads, so gardeners aim to bring it to harvest before the temperatures soar.

Sun Exposure and Soil Requirements

Broccoli prefers full sun but if the temperatures are higher, partial shade may be better to prevent the plants from bolting.

Broccoli grow best in rich, fertile soil amended with plenty of organic matter and with a neutral soil pH.

How to Plant Broccoli

Broccoli gardening begins by starting the seeds indoors, 6 to 8 weeks before the last spring frost. It can also be started by direct sowing in the garden, 2 to 3 weeks before the last spring frost. Work the soil with 2 to 4 inches of aged compost in early spring before sowing the seeds. When planting outdoors, sow the seeds ½ inches deep in soil and 3 inches apart.

Water the soil and maintain it consistently moist throughout the germination phase. Once the seedlings emerge and grow to a height of 2 to 3 inches, thin them to maintain an 18 to 24-inch spacing between the plants.

If started indoors, transplants can go into the garden after hardening off, once they are 4 to 6 weeks old. Plant the transplants 18 to 24 inches apart, setting them slightly deeper in the planting holes than they were in the containers. Water the transplants well just after planting.

Fertilize the transplants with a low-nitrogen formula 3 weeks after planting them in the garden. Provide 1 to 1.5 inches of water each week, maintaining consistent moisture for best development. Always water at the base and avoid getting the developing heads wet. Mulch around the plants to suppress weeds.

Harvest

Towards the end of a successful broccoli growing season, you’ll have plenty of beautiful flower heads to harvest. Here’s how to pick them:

  • Harvest the buds as soon as they’re the size of a large fist, while they’re firm and dense, just before flowering.
  • If you wait too long to harvest, the buds open and the quality of the heads fall. You can still eat them but the texture is tougher.
  • Cut the heads from the base with 4 inches of stalk attached.
  • Let the plant grow after harvesting the main head and side shoots will develop. The new flower heads will be smaller in size than the main head but taste just as good.

Storing

Broccoli stays fresh in the refrigerator for up to 5 days. Store unwashed broccoli loosely wrapped in damp paper towels in the fridge and consume them within the next few days. If you want to store it for longer, you can freeze it after blanching and use it for up to one year. 

Pests and Diseases

Pests

  • Aphids suck the plants’ sap, leaving curling and discolored leaves. Hose them off the plants with a strong jet of water. If the plants are severely infested, insecticidal soap or neem oil can help.
  • Cabbage worms feed on broccoli leaves, causing serious damage to the plants. If handpicking does not help, in the case of serious infestations, treating with Bacillus thuringiensis is typically effective.
  • Flea beetles leave small holes in the foliage, killing off the seedlings and reducing the yield for mature plants. White sticky traps can help capture the insects. Insecticides are also helpful if used early in the season.

Diseases

  • Powdery mildew is a fungal disease that appears as white patches with purple blotching on leaf surfaces. The thick powdery layer coats the leaves, causing them to eventually drop off the plant. If the disease persists, it spreads to the stem and head. Plant resistant varieties, rotate crops, keep the foliage dry and avoid using excessive nitrogen fertilizers to prevent the problem.

Applying all the information you’ve learned from this article, you’re ready to begin a successful and rewarding broccoli growing season.
Okra Gardening

Okra Gardening

Okra, Abelmoschus esculentus, is a herbaceous annual plant from the mallow family, Malvaceae, and is cultivated for its edible seed pods. It’s widely grown in most tropical regions of the world. Plants can grow up to 1.2 to 1.8 meters and typically survive only one growing season. It bears heart-shaped lobed leaves, and yellow flowers with a crimson center. You need to know that when okra gardening, this heat-loving vegetable crop grows through the warm season, coming to harvest by the end of summer. The fruit is picked and consumed while it’s young and unripe. Mature seed pods are tough for consumption.

Types & Varieties of Okra

Okra is rich in minerals, vitamins, antioxidants and fibers and low on calories, making it an excellent addition to your diet. Plenty of varieties are available, distinguished with their length of growing season, size of the plant and appearance and taste of the fruits. ‘Spineless’ varieties also exist that lack the tiny spines on the seed pods that irritate your skin upon handling.

Common varieties of Okra:

Annie Oakley IIThe plant grows to about 4 feet tall, maturing in about 52 days and bears spineless seed pods.

Clemson Spineless – These are the most popular varieties in markets and produce 4-feet tall plants, with a spread of about 48 inches. The variety matures in 55 to 60 days, giving ‘spineless’ fruit that can grow to 9 inches in length.  

Park’s Candelabra Branching – It’s a base-branching variety for easier harvest.

Cajun Delight – It’s a good choice for gardeners with shorter growing seasons since it takes only 50 to 55 days to mature. The plant reaches to about 4 feet tall, giving 3 to 5 inch long dark green seed pods for harvest.

In the ideal conditions, a single okra plant can yield 20 to 30 or even more seed pods. If you’re growing a self-sufficient garden, plan to grow 3 to 3 okra plants per person.

Temperature and Timing for growing Okra

Okra is a warm-season crop that’s planted 2 to 3 weeks after all the dangers of frost have passed in the region and the soil temperature is at least 60°F. The ideal growing temperatures range from 75°F to 90°F.

Sun Exposure and Soil Requirements

Okra grows best with full sun exposure for at least 8 hours a day. Plant it in fertile, well-drained soil that’s slightly on the acidic side, with soil pH between 5.8 and 7.0.

How to Plant Okra

Okra gardening begins when you start seeds indoors in peat pots 3 to 4 weeks before the last spring frost. Grow the seedlings under grow lights until they are ready to go in the garden 5 to 6 weeks later. Seedlings should be hardened off before transplanting them in the garden. Space the transplants 1 to 2 feet apart for optimal development.

Alternatively, you can start the seeds directly in the garden 2 to 3 weeks after all the dangers of frost have passed. Plant the okra seeds ½ to 1 inch deep in the ground, spacing them a foot apart in rows. Space the rows 3 to 4 feet apart to give ample room to the plants to grow. You can also plant the seeds closer together and then thin them once seedlings emerge.

Keep the planting bed well-weeded while the plants are still young and apply 2 to 3 inches of mulch around them to suppress weeds. Offer the plants 1 inch of water per week or more if you live in a very hot region. Side-dress the plants with aged compost every 3 to 4 weeks for best results.

Harvest

After a successful okra garden growing season, you can look forward to a hefty harvest. Here’s how to harvest okra:

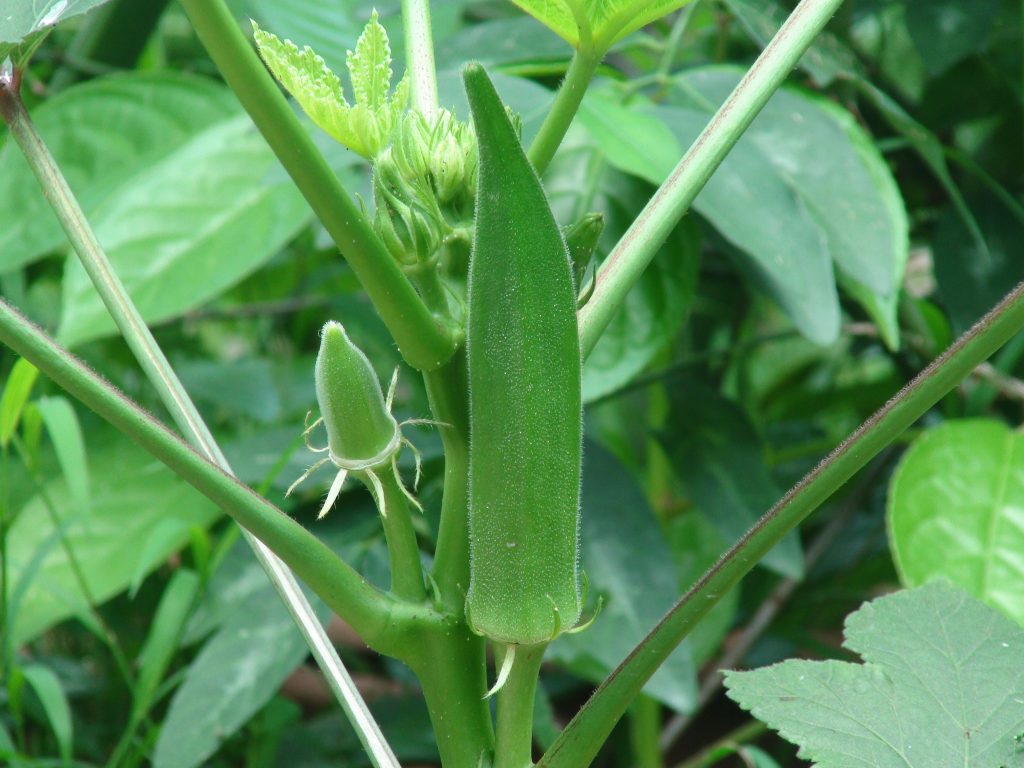
okra gardening, this heat-loving vegetable crop grows through the warm season
  • Okra is ready to harvest in 2 months after planting the seeds.
  • Harvest the seed pods while they’re still young and tender. They should ideally be around 2 to 3 inches long for best texture.
  • Wear gloves when harvesting okra because most varieties have spines that may irritate the skin. Spineless varieties may be harvested without gloves.
  • Continue harvesting the pods every other day to boost further fruiting.
  • Cut the stem just above the pod with a sharp knife to harvest the okras. If the stem is too hard, the okra has matured beyond what’s suitable for consumption. Remove it from the plant and toss it.
  • Remove the lower leaves after the first harvest to speed up production of further seed pods.

Storing

Okra lasts only 2 to 3 days in the refrigerator. Wrap unwashed okra in paper towels or place them in a paper bag before storing in the fridge.

If you want to store for longer, transfer okras without cutting or cooking to freezer bags and place them in the freezer. When stored in the freezer in this way, they can last for up to a year. You can continue using them as needed through the winter months.

Pests and Diseases

Pests

  • Aphids are a common problem with okra plants and can be avoided by growing tolerant varieties. If the infestation is heavy, insecticidal soaps or horticultural oils are a good way to control it.
  • Corn earworms can infest the plants, causing damage to the leaves, buds, flowers and pods. Bacillus thuringiensis can help control these insects naturally.
  • Cucumber beetles may also affect okra plants, damaging the leaves and stems, leaving the plants susceptible to bacterial wilt. Adult beetles also feed on the fruit, leaving behind unsightly scars. Kaolin clay can manage smaller infestations, while you’ll need to use insecticides if the infestation is heavy.

Diseases

  • Powdery mildew often affects okra plants, causing the leaves to roll upwards and give a scorched appearance. Application of suitable fungicides can control the problem, especially in its early stages.
  • Yellow vein mosaic disease is a common viral disease that infects the okra plants and is identified by yellow and green alternating patches on the infected leaves. Fruits are also yellowish and smaller in size. Plant resistant varieties and keep the field weed-free. Once the plant is infected, it will have to be removed to prevent the disease from spreading to the neighboring plants.

Hopefully, with all the things you’ve learned in this article, you can start the perfect okra gardening season and enjoy loads of fresh harvests.

Turnip Gardening

Turnip Gardening

turnip gardening patch

Turnip, Brassica Rapa, is a herbaceous annual or biennial plant belonging to the Brassicaceae family. It has been cultivated as a cool-season vegetable for thousands of years for its edible leaves and roots. Historians believe that turnips originated somewhere in middle and eastern Asia. Today, they are grown in most temperate parts of the world for human consumption and livestock fodder. The plant forms short stems above the ground that bear light green leaves in the form of a rosette above the root. The taproot is round and plump with a combination of purple and white on the outer skin. Though it is a biennial plant that flowers and sets seeds in the second growing season, when turnip gardening the plants are often grown as an annual in early spring or fall and harvested after one growing season.

Types & Varieties of Turnip

Though you might have only seen half purple, half white tennis ball-sized turnips in grocery stores, there are tons of varieties beyond that. There’s a range of colors, sizes, and shapes to select from besides the flavors of roots and leafy tops and the time they take to reach maturity.

Common Varieties of Turnip:

Purple Top White GlobeThis is the standard turnip variety that you find in grocery stores. It forms a 4 to 6 inches wide globe underground with a white bottom and a purple top. It takes between 50 to 55 days to reach maturity and has a spicy flavor that works well in stews and broths.

Baby Bunch Turnips – With small globular roots, about 1 inch in diameter, baby bunch turnips are harvested when they are still much younger than standard turnips. The crunchy flesh is similar to radish and works great in salads and cooked recipes.

Tokyo Cross – This hybrid variety is an AAS winner for the uniform, fast-maturing turnips it produces with mildly sweet and crispy flesh. The turnips are 3 to 6 inches wide white globes that are ready to be picked in just about 30 to 35 days.

Scarlet QueenDifferent from others, this is a hybrid variety that produces turnips with bright red skin and white flesh. The turnips are slightly flat from the top and are harvested in 40 to 45 days.

For a self-sufficient garden, grow 5 to 10 turnip plants per person, spacing them 5 to 8 inches apart in rows. The rows should be spaced 15 to 24 inches apart.

Temperature and Timing for Growing Turnip

Turnip is a cool-season crop, best planted in early spring or fall when the temperatures are cooler. They take between 1 to 2 months to harvest and grow best when temperatures are between 40 to 70°F. For early season turnip gardening, you can sow the seeds in the ground 2 to 3 weeks before the last spring frost for harvesting in late spring. You can also plant them in late summers for an autumn harvest and in late autumn for a winter harvest.

Sun Exposure and Soil Requirements

Turnips thrive in full sun but will also grow well in partial shade. Well-drained, fertile soil with pH slightly on the acidic side (5.5 to 6.8) is best for turnip gardening. Prepare the planting bed well in advance by incorporating plenty of compost or aged manure.  If your garden soil is heavy or clayey, amend it with sand or gypsum for the roots to develop easily.

How to Plant Turnip

For turnip gardening, just like any other root vegetable, turnips don’t transplant well. They are best planted by sowing the seeds directly in the garden once the weather is favorable. Although nursery transplants are available, most gardeners grow turnips by sowing seeds in the garden as soon as the soil is workable in early spring or 2 to 3 weeks before the last expected frost date.

The seeds are sown ½ inches deep in the ground and 1 inch apart in rows. Space rows 15 to 24 inches apart. Once the seedlings emerge and are 3 to 4 inches tall, you can thin them to maintain a 4 to 6-inch gap between the plants. The thinned seedlings make an excellent addition to salads.

Water well right after planting and keep the soil evenly moist throughout the growing season. Underwatered turnips will produce small and woody roots and may also cause the plants to bolt. On the other hand, overwatering promotes diseases, so it’s important to maintain just the right level of moisture. Mulching can help maintain optimal moisture in the soil for the plants and also protects the turnips from frost damage. Since turnips have a rather short growing season, they don’t generally need any fertilization, especially if you grow them in rich, fertile soil.

For a prolonged harvest season, you can practice succession planting every 10 to 14 days, keeping in mind that they can come to harvest before the temperatures soar above 70°F.

Since turnips are small plants, you can easily grow them in containers. Small roots can grow in pots that are at least 8 inches deep. For larger varieties, you’ll need to choose bigger containers.

Harvest

As the growing season approaches a successful end, the plump turnips roots are ready to be picked from the ground. Here’s how to harvest turnips:

  • You can start harvesting the leaves and stems once they are at least 12 inches long but allow the roots to develop further. However, only remove the outer leaves, letting the inner leaves to continue growing and producing the energy that will fuel root growth. 
  • Depending on the variety, turnips take between 30 to 60 days to come to harvest after sowing the seeds.
  • As the turnips approach harvest, their purple shoulders will push out of the soil and are visible above the ground.
  • Lift the roots from the ground using a garden fork once the shoulders are 2 to 3 inches wide. Take care not to puncture the roots with your gardening tools.
  • Fall crop should be harvested after a few light frosts but before a hard freeze since extreme cold can cause the roots to crack or rot.

Storing

Turnip greens will only stay fresh in the refrigerator for up to a week. The roots can last for months if you store them properly. The ideal temperature for storing turnips is between 32 to 35°F. A small harvest can be stored in the fridge, but if you have lots of turnips to store, a cool, dark place such as a root cellar or garage will be ideal. Remove and consume the green tops before storing the turnip roots since the leaves will continue drawing energy from the roots if left attached to them.

Pest and Diseases

Pests

  • Caterpillars, including cabbage loopers, diamondback moths, and beet army worms love eating turnip leaves. The most straightforward approach to get rid of them is to handpick and destroy them. Alternatively, you can spray the plants with Bacillus thuringiensis.
  • Aphids suck the sap from the leaves of turnip plants, leaving behind a sticky substance called honeydew that promotes the development of molds on the plants. Small infestations can be catered to by removing the infested leaves. In the case of large infestations, hose them off with water or spray the plants with neem oil.
  • Root maggots attack the roots and are, therefore, more problematic than other pests. The flies of these worms lay eggs around the plants. The larvae feed on the roots, leaving tunnels in the flesh and causing the plant to shrivel and die. Remove and destroy the infested plants to prevent the spread to the surrounding plants.

Diseases

  • White rust fungus can affect turnips and is observed by the development of white spots on the upper surface of the leaves and yellow spots on the underside. The disease is not serious, and the roots typically remain unaffected. Buy disease-free seeds and plant them in a well-drained garden bed free from any previous season’s debris. 
  • Downy mildew can affect turnip crops in cold conditions and is a serious disease because it can destroy the roots. It is identified as yellow, brown spots on the leaves that expand as the disease progresses. Preventive fungicide sprays can control the spread to other plants if you suspect the disease in your garden. Control weeds and excessively moist conditions to prevent the disease from occurring in the first place.

That’s all the information about turnip gardening that you’ll need to get started on your own. Follow all the tips and enjoy loads of juicy, spicy homegrown turnips!

Asparagus Gardening

Asparagus Gardening

Asparagus Gardening, Asparagus officinalis, is a perennial vegetable crop that’s among the first ones to come to harvest with the onset of spring. It’s a flowering plant species belonging to the family Asparagaceae. It’s cultivated as a vegetable in most temperate and subtropical climates of the world for the succulent stalks that appear in spring. Asparagus is typically served cooked in stir fries, vegetable side dishes, soups, stews and salads. Besides being a good source of dietary fibers, asparagus is also rich in Vitamin B6, magnesium, calcium and zinc. It’s typically planted in early spring from roots or crowns and takes about 2 to 3 years to establish and start producing a decent harvest. However, once established, an asparagus crop can be productive for over 20 years!

Types & Varieties of Asparagus

Different Asparagus varieties exist, with distinct differences in colors, appearance and quality of spears. Asparagus plants can be either male or female. The newer cultivars are bred to be all male since the plants consume all their energies into the development of the plant instead of seed production, giving you larger and more abundant spears.

Common varieties of Asparagus:

Mary Washington – The most common asparagus variety is an heirloom and is a favorite among gardeners for the long green spears with purple tips that it produces. It’s rust-resistant and is ready for light cuttings in 2 years.

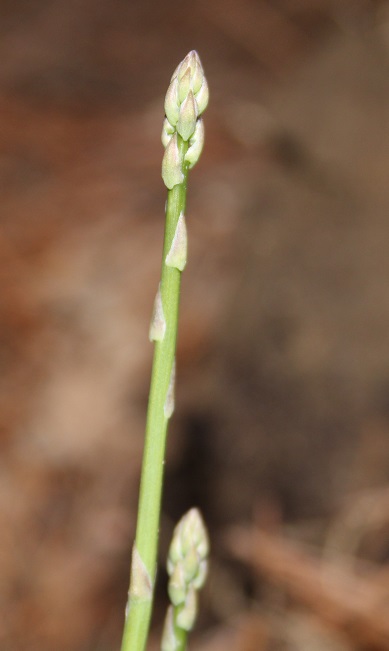
asparagus spear from 2nd year plant

Jersey GiantIt is an all-male early yielding variety that’s bred for rust and fusarium wilt resistance and is cold hardy so it will perform exceptionally well in northern climates.   

Purple Passion – As the name implies, this variety produces purple spears, but the color fades with cooking. The attractive spears are sweet in flavor ready for harvest around April to May each year.

Apollo – this is a hardy asparagus that grows well in both cold and warm climates. It’s very disease resistant and yields a large crop with medium to large dark green sized stalks with a hint of purple on the tips.

Depending on how often you consume the vegetable, plant a garden with around 5 to 20 asparagus plants for every person. Since individual plants are spaced 3 feet apart, this makes about 12 to 60 feet of row for each family member.

Temperature and Timing for growing Asparagus

Asparagus are perennial vegetables that prefer a temperature between 70 to 85°F at daytime and the nighttime temperature should be between 60 to 70°F. Asparagus crowns are usually planted in spring as soon as the soil can be worked. Each year, young, tender shoots will appear in spring as soon as the soil temperature stays above 50°F in spring.

Sun Exposure and Soil Requirements

Asparagus plants grow best in full sun to develop healthy, thick spears. Without adequate sunlight, you’ll find thin, weak spears and the plants are more prone to diseases. Choose a well-drained garden bed for your garden and amend the soil with plenty of organic matter and remove weeds and stones from the area to prepare the land for a perennial vegetable that will stay in place and provide you with succulent spears for years to come.

How to Plant Asparagus

Asparagus can be grown from 1-year old crowns or seeds. Most gardeners prefer growing crowns since it gives a jump-start on the crop, eliminating some of the wait time before you can start harvesting the spears.

When growing from seeds, seeds are started indoors in early spring. Plant the seeds in a good seed starting mix filled in peat cups. Seedlings are transplanted outdoors once they are at least 12 weeks old and the last spring frost has passed.

By the fall, the plants will mature and you’ll be able to tell apart the berry-less male plants from the female ones. You can remove the female plants since they are less productive and allow more space for male ones to grow.

To plant crowns in the garden, prepare the soil to a depth of at least 12 inches, removing any hard stones or weeds that you find along the way. Amend the soil with 2 to 4 inches of compost and other organic matter.

Dig 12 inches wide and 6 inches deep trenches into the ground, spaced 3 inches apart from each other. Next, create a 2-inch tall ridge of soil along the center of the trench and place the crown over the mounds, spacing them 12 to 18 inches apart. Add about 2 inches of soil to the trench to cover 2 inches of the crown from the bottom. As the crowns grow taller, add more soil to the trench, 2 inches at a time until it reaches ground level.

Once the trench is filled with soil, add mulch to prevent weeds from taking over. During the first two years of growth, offer the crop 1 to 2 inches of water each week. Since asparagus is a heavy feeder, it will also need regular nourishment to keep up production. When asparagus gardening, top dress annually with compost before shoots start appearing in spring and fertilize with an organic fertilizer around mid spring when the growth is at its maximum.

Harvest

Generally, you should wait until the third year to start harvesting the spears.

  • During the third year, only harvest a few spears for two weeks at the most and let the remaining spears develop undisturbed.
  • During the fourth year, you can harvest spears that reach 5 to 7 inches in height by cutting them with a knife just above the soil level. You can harvest for up to three weeks.
  • During the fifth year, the harvest time can extend up to six weeks.
  • Following the fifth year, you can continue harvesting the spears all through the spring, as they appear from the soil.

Storing

Asparagus spears don’t do well in storage and are best consumed fresh, within two to three days from harvest. Wash the spears with cold water and dry them before storing. Bundle the stems, wrapping them lightly with a paper towel and store them in a plastic bag before refrigerating.

Pests and Diseases

Pests

  • Asparagus beetles are a common problem with this vegetable. The insects cause spears to turn brown, ultimately defoliating the crop and diminishing harvest. Remove the beetles by hand or hose them with a strong spray of water.
  • Cutworms attack the stems of young shoots, cutting them just above the soil level. Keeping the area weed-free and removing plant debris can prevent these from finding your crop. Remove them by hand as you find them.

Diseases

  • Asparagus Rust is a fungal disease that shows up as pale green spots on newly emerged shoots. By summer, they turn into reddish brown lesions and then black by fall. Severe infection can cause defoliation. Choosing resistant varieties, ensuring air circulation and preventing excessive moisture in the soil can help prevent the infection.

Follow the guide above and you’ll have fresh, crunchy spears to harvest in just a couple of years – homegrown asparagus are worth the wait!