Tag Archives: gardening

Beet Gardening for Success and Food

Beet Gardening for Success and Food

Beets are a root vegetable that has been cultivated for thousands of years. They are biennials grown as an annual in the garden. Their origin is unclear, but they are believed to have originated in the Mediterranean region or possibly in Egypt. The ancient Greeks and Romans used beets for medicinal purposes and as food. Beets were also used as a natural dye, particularly for fabric and leather. Today, they are grown all over the world, with the largest producers being Russia, the United States, and Poland. Beet Gardening for Success and Food is not difficult.

Types and Varieties of Beets

There are several varieties of beets, each with its own unique characteristics. The most common are red beets, golden beets, and chioggia beets.

Red beets are the most common. They have a deep reddish-purple color and are often used in salads, soups, and roasted dishes.

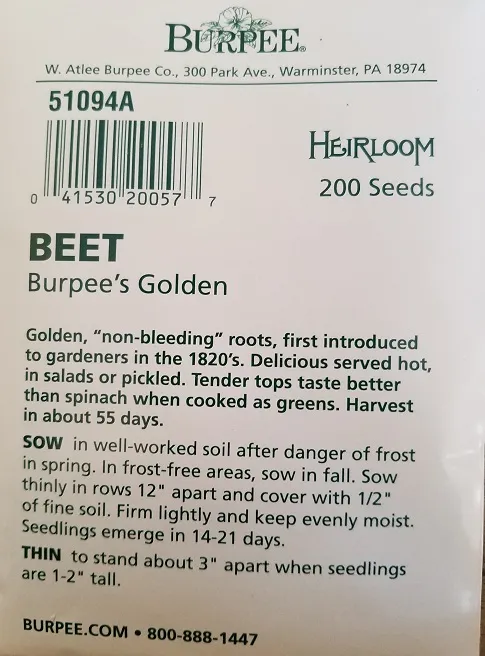
Golden beets have a bright, sunny yellow color and are milder in flavor than red beets. They are often used in salads and roasted dishes.

Chioggia beets, also known as candy-striped beets because of their striking red and white striped flesh, have a slightly sweeter taste than red beets and are often used in salads and as a garnish.

Choosing Beet Varieties: Color and Days to Maturity

When choosing a beet variety, differences such as flavor, texture, size, sugar content (the roots are typically high in sugar, 8% to 20%), and days to maturity should be considered. Here are three examples of the many to choose from:

  1. Red Ace – This variety produces round, smooth, deep-red beets that are about 3 inches in diameter. They mature in about 55 days and have a sweet, tender flesh.
  2. Golden Detroit – This variety produces medium-sized, round, golden-yellow beets that are about 2-3 inches in diameter. They mature in about 55 days and have a mild, sweet flavor.
  3. Chioggia – This variety produces medium-sized, round beets with a distinctive red and white striped flesh. They mature in about 60 days and have a sweet, tender flavor.
  4. Lutz Green Leaf is a large plant with tasty green leaves. Its baseball-sized, heart-shaped roots are sweet and tender and it and stores well. With their large size, these beets take a bit longer to mature at about 80 days.

Growing Beets Tips for Planting, Care, and Harvesting

It will take approximately 2 ounces, roughly 1,500 beet seeds, to plant a 100 foot row. In a good year, the yield would be about 80 to 100 lbs. of roots – excluding the greens. If you are planning a “year-round” food supply, plant about 10 – 15 feet per person. That would provide approximately 8 lbs. – 15lbs. per person – roughly 40 to 60 beet roots which can be turned into 8 to 15 pints of canned beets. Beet Gardening for Success and Food will provide vitamins, minerals, and important nutrients.

Soil

Beets prefer well-drained, loose soil that’s rich in organic matter. Add compost or well-rotted manure to the soil a few weeks before planting. Soil pH should range between 6.0 to 7.5. If your soil is too acidic, add lime to raise the pH level. If it’s too alkaline, add sulfur to lower the pH level.

Planting

Beets can tolerate cold and near freezing conditions but do best with temperatures from 50°F to 75°F. They do not do well in hot weather. The roots can get tough and fibrous. They are a perfect option for spring and fall crops in northern zones or as a winter crop in zone 9 and higher.

Beets can be grown by either sowing seeds directly into the garden or transplanting seedlings. Whether you decide to direct sow into the garden or start your seeds in pots, soak seeds for 24 hours before planting. You need to understand that beet “seeds” are a cluster of several small seeds together. After the seeds germinate and the seedlings are 2 inches tall pull the weaker shoots to allow the strongest the room it needs.
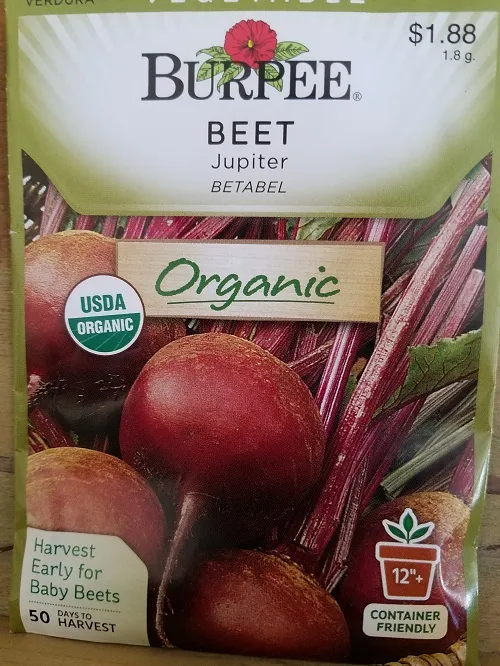
This variety produces round, smooth, deep-red beets that are about 3 inches in diameter. They mature in about 55 days and have a sweet, tender flesh.

When starting seeds indoors for transplanting, use small 2” x 2” pots so the seedlings have enough room to grow – both above and below the soil line. Try to start the seeds about 30 days before your last spring frost. I use a sterile seed starting mix. Soak seeds for 24 hours then plant 1/2” deep and place the pots under grow lights. When daytime temperatures are expected to average 50°F and danger of frost has past, transplant into the garden.

When direct sowing, begin planting as soon as the soil has warmed to about 45°F. Beet seeds should be planted about 1/2 inch deep and spaced about 2 inches apart, space rows about 12” to 18” apart. To ensure maximum germination, keep the soil moist. Seeds should germinate in 7 to 15 days. When the seedlings are 6” tall, pull every other plant. The final spacing between plants should be a minimum of 4” – 6”. You can use what you pull – both roots as well as greens.

Plantings can be made every 2 weeks before mid-summer. One way to judge when to stop planting in the spring is to check average temperatures in your area. When the average temperature is expected to average over 80°F, count back 60 days – that should be the last date for spring planting. For Autumn planting, start sowing seeds 10 – 11 weeks before frosts are expected.

Watering

Beets need consistent moisture to grow properly, but they don’t like to be waterlogged. Water regularly, but don’t overwater. An inch of water each week is recommended for proper growth. Mulching around the plants can help to retain moisture and suppress weeds.

Sun Exposure

Beets prefer full sun, but they can also grow in partial shade. However, if grown in too much shade, they may not develop the deep, rich color and flavor that they’re known for.

Fertilizer

Beets are heavy feeders, however, choose a fertilizer that is lower in nitrogen than both potassium and phosphorus. Too much nitrogen will lead to more leaf growth at the detriment to the roots. You can also add a side dressing of compost or other organic fertilizer once or twice during the growing season.
Beet Gardening for Success and Food This variety produces medium-sized, round beets with a distinctive red and white striped flesh. They mature in about 60 days and have a sweet, tender flavor

Problems, Pests, and Diseases

Beets are generally resistant to pests and diseases, but there are a few that can cause problems. The most common pests are aphids and leaf miners.

Aphids can be controlled by spraying the plants with a solution of water and dish soap.

Leaf miners can be controlled by removing infected leaves and applying a natural insecticide.

Flea beetles are a common pest problem. They damage leaves by leaving numerous tiny holes in beet leaves. If the infestation is bad enough the plants can be killed. Two organic methods to control flea beetles are:

  • using floating row covers to protect the plants and
  • adding beneficial nematodes in the soil to attack and kill the beetle larvae.

Cabbage loopers, tiny green caterpillars that can destroy the plant can be controlled by using Bacillus thuringiensis (Bt) to control.

A common disease affecting beets is powdery mildew. This can be prevented by ensuring good air circulation around the plants and avoiding overhead watering. If powdery mildew does occur, remove infected leaves and apply a natural fungicide.

Keep beets well-irrigated to prevent scab, the same disorder that affects potatoes, causing raised brown rough spots on the mature roots.

Boron deficiency in the soil can cause an internal breakdown or browning. This is most likely to occur in alkaline soils after prolonged hot, dry periods. If this happens, get a soil test to confirm. Adding one tablespoon of borax to a gallon of water will provide enough boron for a 250 square foot garden to fix.

Damping can impact seedlings (both direct sow as well as in the greenhouse) Different forms of soil-borne fungi that grow in wet, humid environments cause damping. It’s most likely damping off if the seedlings die unexpectedly not long after planting, and the plants look discolored and decaying. Enable the seed-starting mix to dry entirely before watering, and make sure your soil has good drainage. Do not overwater your plants.

Cercospora leaf spot is a fungus that occurs on the leaves as dark, patchy spots that may be yellow in color. Remove the affected leaves and throw them out, avoid touching healthy looking leaves. If your beets are planted close together, thin them out, so crowded plants have a better chance to grow. Cercospora can be controlled by spraying Mancozeb

Harvesting and Storing Beets

You should pull beets when the soil is dry. Be careful when pulling or lifting roots from the ground, if you need to use a pitchfork or shovel, do so carefully. Do not to break or injure the beets.

Beets can be harvested at any time however, they will mature at about 1 1/2 to 2 inches in diameter. Be sure to cut off the leaves about 1 inch above the beet before storing. The green tops are edible, and frankly very tasty. If you cut away the greens at the root, you may cause damage and the root to bleed.

Any roots that are damaged should be used within a few weeks, they will not store well and rot spots will start at any damage. To prepare any roots for storage, carefully rub soil from the roots, try not to wash but if you do, dry them.

Beets can be stored in a cool, dry place for several weeks. Store beets in a cold moist place as near to freezing as possible without actual freezing, 32°-40°F and 95 percent relative humidity in a container—a bucket or plastic storage box or cooler with moist sand, peat moss, or sawdust. Don’t pack roots too tightly; if the roots touch they can start to rot; be sure to leave 2 inches (5 cm) of insulating material around at the top, bottom, and sides of the stored roots. Set the lid loosely so that there is good air circulation.

For long term storage, beets can be cooked for about twenty minutes then frozen. They can also be pressure canned or pickled and canned using a hot water method, see Ball Jar Recipe Blog for recipes for both methods of canning.

By following these tips for planting, care, and harvesting, you can enjoy a bountiful harvest and enjoy a beet gardening for success and food

The below chart provides the calories, vitamins, minerals and other important nutrients provided by 100 grams (roughly 3 ounces) of raw beets. The information from this chart comes from USDA Nutrient Database

Beet Gardening for Success and Food

Garlic Gardening Made Simple

Garlic Gardening Made Simple

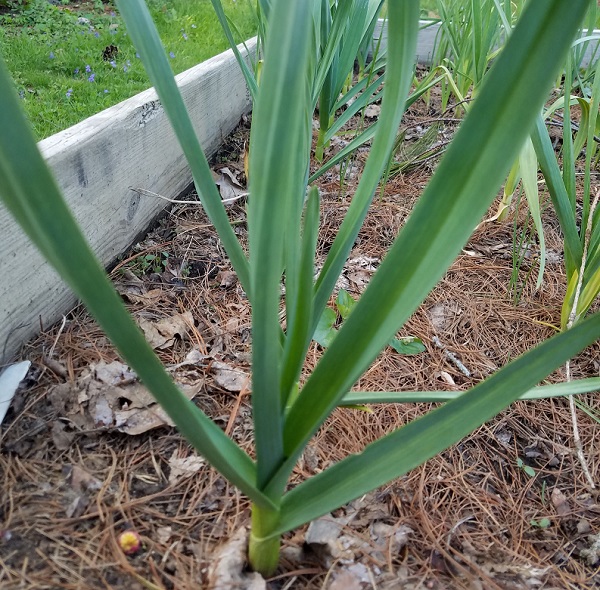
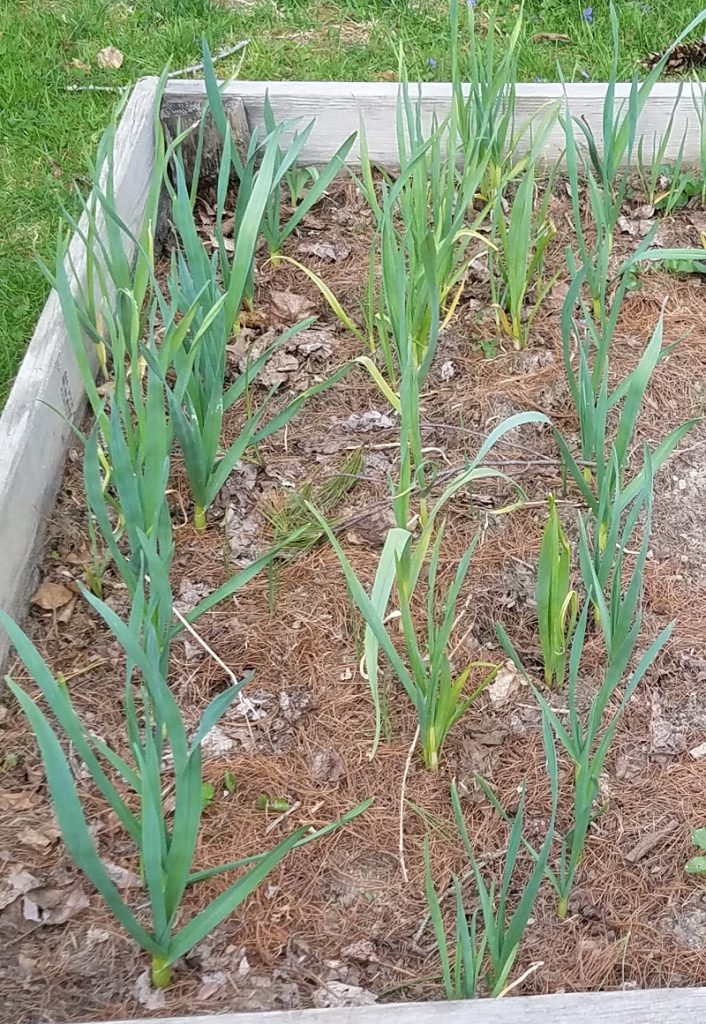
raising healthy plants by reading this blog on garlic gardening

Garlic is often thought of as an herb but botanically it’s a vegetable. Few people think about garlic gardening, sticking instead with the normal garden vegetables like tomatoes and peppers, but it’s an easy-to-grow vegetable that pairs well with many other foods.

Even in the garden garlic pairs wells as a companion plant that provides pest protection and enhances vegetable flavor. Tomatoes, potatoes, carrots, broccoli, and cabbage benefit from having garlic planted near them in the garden and will benefit the second time when paired with fresh garlic in a recipe.

Use these tips to successfully grow garlic in your home garden.

Native Garlic

Garlic, (Allium sativum) is native to Asia but grows as a wild plant in Italy and parts of France. It’s a perennial plant that has an edible bulb with a distinct aroma and flavor. Garlic is a flavor-filled vegetable that has found its way into recipes all across the world and is closely related to the onion and leek.

Everyone knows that eating garlic will leave behind a lingering odor in the mouth but eating it also provides health benefits. Compounds in garlic are said to reduce blood pressure, lower bad cholesterol, stabilize blood sugar, reduce bronchitis symptoms, and provide several other health benefits.

Enhance the flavor of your food while improving your health by adding a little garlic to your meals.

Types Of Garlic

* Soft-necked garlic is the most common type and is typically sold in all supermarkets. The soft-necked type is divided into two categories – artichoke and silverskin.

* Artichoke garlic has multiple layers, like an artichoke, that overlap and will contain 15-20 cloves. This type has a thick, white outer layer and will remain fresh for up to 8-months when stored properly.

Applegate, Polish Red, Early Red Italian, Italian Late, and Galiano are a few of the artichoke garlic varieties.

* Silverskin garlic is the easiest to grow in a home garden and is an abundant-producing variety. Polish White, Chet’s Italian Red, and Kettle River Giant are the most common types of silverskins.

* Hard-necked garlic has large cloves with intense flavor and is easy to peel. The most common types of hard-necked garlic include Chesnok Red, German White, Purple Stripe, Persian Star, and Porcelain.

Because garlic is grown worldwide and each region has developed its’ own strain of garlic, there is not a ‘true’ garlic that will look and taste the same everywhere in the world.  While garlic gardening, experiment with different garlic types in the garden so you can discover which ones grow best in your climate and which ones have the flavor you prefer.

When To Plant Garlic

Garlic cloves are planted in the middle of fall (autumn) when all other garden plants have finished their growing season. Garlic is ‘put to bed’ for the winter because it needs a season of cold temperatures, “stratification” to grow.

Before the soil freezes but after it has cooled down significantly, is the ideal time to plant garlic. The cloves will need 3-6 weeks before the soil freezes to develop a root system.

Sun and Soil Requirements

Garlic prefers a spot in the sun so select a growing location that will be in full sun. There are no leaves in late autumn on most of the trees to block the sun but bear in mind the sun’s patterns changes during the winter and a sunny summer location might now be in full sun during the winter.

Well-draining soil that is fertile and crumbly is best for garlic gardening. Incorporating plenty of compost into the soil before planting will provide nutrients to the garlic, promote good drainage, and help keep the soil from compacting during the winter.

How To Plant Garlic

Garlic gardening

Each garlic plant is comprised of multiple cloves. You want to plant individual cloves so gently break apart the garlic bulb into separate cloves and place the root-side of each clove facing down in the planting row, when they grow, they will form new bulbs. Plant the cloves in mid-fall when the soil is still slightly warm. Create rows that are 12-inches apart and 2-inches deep. Space the cloves 6-inches apart.

Place 1-inch of soil on top of the cloves followed by 1-inch of mulch. Water thoroughly.

Leave the garlic alone during the winter and as soon as the soil warms up in spring the cloves will begin to grow green tops that resemble the top of an onion.

Now a garlic gardening tip, as the garlic grows, it will send out stalks that will have flower heads. These are called scapes. Let these grow for a bit. They can become quite beautiful. Often times these flower stalks wrap around. As they begin wrapping, cut the scapes off. If you leave them on the energy will go to the flower – you want all energy at this point directed at growing the bulbs. The scapes are quite edible.

Harvesting Garlic

When the lower leaves of the green stalk begin to turn brown the garlic bulb is ready to harvest.

To test for ripeness, dig up just one bulb to see if it has filled out its’ skin. Bulbs harvested when the skin appears to be baggy will result in smaller garlic bulbs and a milder flavor.

Use a shovel to dig down 4-inches behind the stalk, then lift up on the shovel to remove soil and bulb together. Do not pull up by the stalk. Gently brush the soil from the garlic bulb but do not wash before storing.

Storing Garlic

Lay freshly harvested garlic on a table in a single layer in a dry, dark location that has plenty of air circulation for 7-days. This will allow the skin to dry and begin to toughen. After the initial 7-days, the bulbs will need to be stored long-term in a cool, dry, dark location that has plenty of air circulation.

Light and moisture will promote the development of mold on the harvested bulbs. Keep them in the dark, keep them dry, and keep the air circulating around them.

Pests and Diseases

Pests

Bulb mites, leafminers, thrips, onion maggots, and nematodes are pests that enjoy eating garlic bulbs. Create a tea of 1-teaspoon of crushed red pepper flakes and 1-cup of hot water. After the water cools, pour it onto the soil around the garlic to repel most of the pests that attack the bulbs.

Diseases
The plants are susceptible to several diseases, including White Rot, Basal Rot, Rust, Penicillian Decay, and Downy Mildew. Certain disease can be treated and stopped by removing the affected leaves, however, more serious diseases like White Rot will require the garlic plant to be removed from the soil and burned. The soil will need to be removed to prevent the spread of the diseases also.

Brussels Sprouts Gardening

Brussels Sprouts Gardening

Brussels sprouts, Brassica oleracea, are a unique type of cabbage belonging to the Brassicaceae family. Though the vegetable is native to the Mediterranean region like other cabbages, they’re named after Brussels, a city in Belgium, where they have been popular since the 13th century. Brussel sprouts are rich in nutrients, primarily antioxidants, fibers, and Vitamin K. Something you need to know about brussels sprouts gardening is they are an annual cool-weather crop that grows up to 2 to 3 feet in height, forming numerous miniature cabbage heads along thick stalks. They’re planted in late summers, taking about 80 days from transplant to reach maturity and be harvested in late fall or early winter. Brussel sprouts taste best when they’re harvested after being subject to light frost.

Types & Varieties of Brussels Sprout

Different Brussels sprout varieties exist, with subtle differences in the sizes and number of buds attached to the stalks and also their color and flavor. Several tiny buds are attached close to each other in some varieties, while others have bigger buds with some spacing between them. Colors range from pale green to reddish-purple. 

Common varieties of Brussels Sprouts:

  • CatskillIt’s an heirloom variety, introduced in 1941. It produces 2” round, deep green sprouts attached to long, strong stalks. It takes between 85 to 110 days to grow to maturity.
  • Dagan – The variety produces bright green sprouts that hold their shape well at harvesting. They grow tall stalks with medium to large sprouts, taking about 100 days to reach maturity.
  • Green Gems – These varieties grow to about 34-36” tall, packed with beautiful 1.5” sprouts. The mini cabbages have a golden interior and reach maturity in just over 85 days.
  • Churchill – It’s a fast-growing hybrid that produces flavorful, green sprouts in as little as 90 days. 

If you’re building a vegetable garden for self-sustenance, plan around 2 to 8 Brussels sprout plants per person, and since the individual plants are spaced at least 16” apart, plant around 8 to 10 feet per person.

Temperature and Timing for growing Brussels Sprout

Brussels sprouts are cool-season vegetables that grow best at temperatures between 45 and 75°F. In warmer climates, they’re planted in late summers for a winter harvest, while in cooler climates, they’re planted in early summers to be harvested in the fall. They can tolerate below-freezing temperatures for a couple of days. In fact, the flavor is enhanced when they’re subject to light frost.

Sun Exposure and Soil Requirements

Full sun, with exposure for at least 6 hours a day is best for Brussels sprouts gardening. They prefer growing in fertile, well-drained soil that’s amended with plenty of organic matter. Make sure the soil pH is between 6.5 to 7.

How to Plant Brussels Sprout

Brussels sprout gardening begins by planting the seeds ½ to ¼ inch deep in pots or seedling trays 12 to 14 weeks before autumn’s first frost. Plant 2 to 3 seeds in each module and maintain moisture in the soil. The seeds will sprout in 7 to 12 days. After the seedlings appear, remove the weaker ones, keeping the strongest ones to develop further. Once the seedlings are 4 weeks old, they are ready to be transplanted into the garden.

When it’s time to transplant them in the garden, harden off the plants by setting out the seedling tray in a shady spot outdoors, bringing them back inside for the night. Increase the sun exposure gradually until they’re ready to be planted in the garden bed in about a week.

Set the transplants 16 to 18″ apart in rows that are spaced 30 inches apart. Remember to firm the soil around the seedlings, so they’re well-anchored to the ground as they develop into mature plants.

Brussels like their soil evenly moist. Offer about 1 inch of water each week, watering at the base of the plant. Overwatering can result in stunted growth and root rot, so be careful in providing just the right level of moisture. 

Fertilize the soil once before setting the transplants and a second time at mid-season. For fertilizing the sprouts, you can either side-dress the plants with aged compost or use a balanced organic fertilizer, such as 5-5-5.

Stake the plants since they’ll become top-heavy as the buds start developing. If there isn’t a stake for support, the plants will lean over or fall.

Harvest

Once your Brussels sprout gardening goes successfully, there will be loads of sprouts to harvest at the end of the season. Here’s how you harvest sprouts:

  • As the crop approaches harvest, the leaves near the buds start turning yellow. It takes about 3 to 4 months for the buds to come to harvest from the time of transplanting. Once the buds are about 1.5 inches in diameter and still firm, it’s time to harvest them.
  • Near the end of the growing season, remove the lower leaves to allow more room for the development of the buds.
  • The lower buds mature first; puck them before they turn yellow. Yellow buds are bitter. Harvest the upper bulbs as they develop. If you want all the sprouts to come to harvest at the same time, pinch out the growing tip.
  • If a drastic temperature drop or rise is predicted in the coming days as the plant approaches harvest, you can harvest the entire stalk. The stalk is also edible once the tough outer layer is removed. 

Storing

When stored unwashed in a plastic bag, Brussels sprouts will stay fresh in the fridge for over 3 to 4 weeks. Remove the loose, yellow outer leaves from the buds before storing them. Blanched sprouts can be frozen and used for up to 4 months.

Pests and Diseases

Pests

  • Aphids are a common problem with Brussels sprouts. These insects collect on the stems and weaken the plants by sucking the sap from them. You can hose them off with water.
  • Cabbage loopers and cabbage worms also attack Brussels sprouts. You can either handpick and kill them or spray the plants with Bacillus thuringiensis.
  • Cutworms often come out at night to feed on the plants. Place cutworm collars around the plants at the beginning of the growing season to protect the young plants.

Diseases

  • Brussels is susceptible to cabbage yellows. This is a fungal disease that begins at the lower buds, turning them yellow and then progressing to the higher buds. Plant resistant varieties and apply compost tea regularly to prevent the disease.
  • Clubroot is another fungal disease that affects Brussels sprouts. They result in the swelling of roots and weakening and wilting of the plants. Maintaining a neutral soil pH and an adequate supply of calcium and magnesium can help control the disease.

Follow this guide, and you’ll hopefully grow lots of crunchy, flavorful Brussels sprouts to grace your dishes.

Radish gardening

Radish Gardening

Radish gardening is simple. They are among the fastest growing vegetables in the garden. These roots have a spicy, peppery flavor and the greens are super nutritious and delicious. Planting can be as easy as dropping seeds among slower growing vegetables like carrots or broccoli or cabbage – the radishes germinate and identify the row before the slower growing plants emerge.

The crunchy spring variety includes:

Cherry Bomb – maturity in 22 days

Crimson Giant – maturity in 30 days

Burpee White – maturity in 25 days

French Breakfast – maturity in 26 days

Early Scarlet Globe – maturity in 26 days

Organic Sparkler – maturity in 26 days

Where to Plant

Choose a site that gets at least six hours of sun a day. Spring radishes are not a finicky root vegetable. They do like full sun when the weather is cool yet will handle some shade when it’s warmer.

Because they are quick to sprout, simply sow them in any empty spaces in a bed.

Planting

Radish gardening - do not plant the seeds too deep

Since radishes like it cool and they grow fast, they are not candidates for starting in flats and transplanting. As soon as the garden’s soil is workable in the spring, you can plant a first sowing. Plant additional rows through early May for your spring crop. Autumn planting can begin again August 1 through September 1 for harvests into October and November.

Till the soil to a depth of at least eight inches, then make furrows about six inches apart and plant the seeds at a depth of about 1/2 inch and cover loosely with soil or peat moss (anything that will not clump up and make it difficult for the seeds to sprout). Allow about one inch between seeds in the row then thin to 2 inches as they mature.

Do not cultivate too deeply or you may damage the roots. Use a hand tool or a hoe and cultivate just deeply enough to cut the weeds off below the surface.

Sunlight and Soil Requirements

As previously stated, choose a site that gets at least six hours of sun a day. For the best radishes, plant them in a friable soil when the weather is cool and provide constant moisture. Any well-drained, slightly acidic to neutral soil with pH 6 to 7 will do for radishes. An overly rich soil will encourage lush foliage at the expense of crisp, tasty roots. If the soil is too dry, radishes may bolt and become pithy and too pungent to eat. If too wet, the roots will split and rot.

Succession Planting

Make small weekly sowings, trying different varieties to obtain a wide mix of radishes. Because most spring varieties mature in less than a month, succession plantings ensure a steady supply of radishes. When warm weather (65 degrees or higher) arrives, stop sowing as radishes will not tolerate heat and will rapidly go to seed. However, in late summer, you can start planting again for an Autumn harvest.  

Harvesting

Although radishes are easy to grow, when radish gardening knowing to harvest is the key to perfect radishes with crisp roots and mild flavor instead of hot as fire and as pithy as corks. Garden radishes are usually ready for harvest three to five weeks after planting. You can pull them any time they reach a usable size. They will get fibrous and develop a strong taste if left in the ground too long. Remove greens and wash roots well.

Problems

The worst invader of the radish patch is the root maggot. Luckily, this pest is easily avoided with a proper crop rotation. Never plant radishes in a bed that contained a cole crop in the last three years. If you incorporate some wood ashes in the soil, the maggots shouldn’t present a problem.

Flea beetles make tiny holes in the leaves, slugs and snails chew grooves in perfect roots, and a sudden deluge can cause radishes to split and start rotting.

Spinach Gardening

Spinach Gardening

General

Spinach Gardening is growing a cool-weather crop that if handled correctly will produce in the garden. The plant prefers a more alkaline soil – keep that in mind. If allowed to grow into the hot weather of summer with its longer days it may bolt – go to seed.

Spinach seed does not store well so you should not keep for more than a few years, I have had seeds germinate after two years but the seed will lose its virility quicker than other seeds – or so I believe.

Back to Garden Index

Types/Varieties

There are both smooth-leafed and dimpled or savoy-leafed spinach varieties. Different varieties are grown by many seed companies including Burpees (my favorite) and High Mowing Seeds (A very close second)

Where to Plant

Select a planting site with full sun (at least 6 hours) and well-drained soil.

Planting

Spinach gardening is pretty easy, just make sure you have good PH, and watch the temperature

I have read that spinach plants don’t do well when transplanted. I have grown them both ways (direct sowing and transplanting) without much headache. Sow spinach seed as soon as the soil can be worked; however, if the weather turns cold or wet, the risk of having nothing sprout or a prolonged germination period may happen.

Sow seeds 1/2 inch deep and two inches apart in rows 12 inches to 18 inches apart. One ounce of spinach seed should be enough to plant 100 feet of row. If conditions are good the seeds should germinate in about 1 to 2 weeks. As the seedlings emerge, thin to about 3 inches apart. When the plants become large enough that they touch each other, pull every other one to give the plants some space (eat what you pull) since overcrowding stunts growth and encourages plants to go to seed. If you want, at this point apply some 10-10-10 fertilizer around the plants at the rate of 3 ounces for each 10 feet of row.

Sunlight and Soil Requirements

Spinach does best when growing in moist, nitrogen-rich soil. Plants prefer soil pH of between 6.5 to 7.5. Spinach does not do well in acid soil. If necessary, add calcium to your soil around the spinach plants.

Care

Water the new seedlings well in the spring.
Roots are shallow and easily damaged so do not use garden rakes around the plants
Keep soil moist with mulching.
Spinach can tolerate the cold; it can survive a frost
Cover the crop with shade cloth if the temperature goes above 80 degrees.

Succession Planting

In the north, sow seeds weekly in the spring until 6 weeks before average daily temperatures are expected to be over 75°. In late summer, as soon as temperatures average below 75°, start weekly sowing until 6 weeks before temperatures are expected to start dipping into the 20’s.
In the south grow spinach as a late autumn to winter crop or late winter to spring crop and use the same temperature parameters described above as a planting guide.

Harvesting

In six weeks to eight weeks, start harvesting any plant that has leaves 6 inches to 8 inches long. You can harvest the entire plant by cutting at the soil surface.

A good crop would be 3 to 5 lbs. per 10 feet of row. If you are a “12 month gardener” you will want to plant about 10 feet to 20 feet of row per person. The leaves contain iron, calcium, and vitamins A, B, and C

Problems

Spinach blight, a virus spread by aphids, causes yellow leaves and stunted plants.

Downy mildew, which appears as yellow spots on leaf surfaces and mold on the undersides, occurs during very wet weather. Reduce the spread of disease spores by not working around wet plants. Avoid both of these diseases by planting resistant cultivars.

Leafminer larvae can burrow inside leaves and produce tan trails (these are my biggest problem).

Slugs also feed on spinach.

Back to Garden Index

Flea Beetle Identification

General

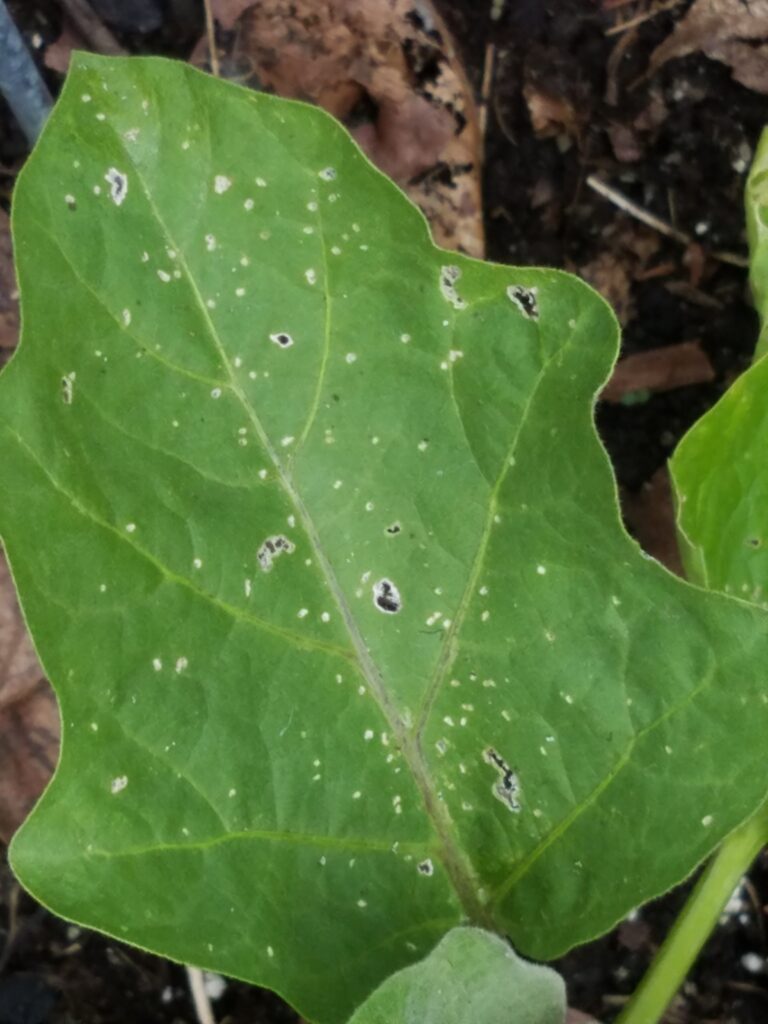
Flea beetle damage on an eggplant leaf

The flea beetle is a type of leaf beetle that can be found anywhere and on many different plants – vegetable crops; shrubs; weeds. Some species of these little beetles do good by eating invasive weeds while many of their relatives are known garden pests that can exact extensive damage to plants including radishes, broccoli, cabbage, turnips, eggplant, peppers, tomatoes, potatoes, spinach and melons to name a few.

Common types of Flea Beetles:

Crucifer flea beetle; crucifer flea beetle; striped flea beetle; western black flea beetle; potato flea beetle; spinach flea beetle

Description

Most adult flea beetles are small, 1/16 –1/8th inch long. An exception is the spinach flea beetle, which is 1/4-inch long.

Since there are different species, flea beetles come in different colors such as: black, bronze, bluish or brown to metallic gray. Some even have stripes. They all have large back legs which they use for jumping (something like fleas) – this can make for easy identification.

Their eggs are very small and are white. They are laid in the soil. Unless you are trained and have a strong magnifying glass, don’t bother looking for any.

Larvae are small white grubs. They will be down at the root level. Again, unless you are trained and have a strong magnifying glass, don’t bother looking for any.

Territory/Habitat

Based on the many species of this bug, they are found worldwide.

Diet

Plants, leaves, stems, fruit and the larvae of certain species are known to eat roots. These can be bad garden or crop pests. For gardeners, eggplant, corn, and cabbage family crops (i.e. cabbage, broccoli, and cauliflower) are very susceptible. There are flea beetles that attack tomato, potato, pepper, beet, spinach, turnip, radish, plus almost every other vegetable to some degree.

Signs of Damage

Flea beetles chew irregular holes in the leaves that can look like small, scattered pellet shot. Severe flea beetle damage can result in wilted or stunted plants. They can attack and destroy seedlings. I have had eggplant seedlings so severely impacted that the harvest was basically nil. When damage is bad enough crop production will be adversely affected.

Life Cycle

Flea beetles live through the winter as adults in leaf litter or other protected cover. They become active in early spring. Depending on the species, females lay single or clusters of eggs in small holes, in roots, soil or leaves of many vegetables as well as occasionally on flowers and ornamental shrubs and trees.

Small white larvae hatch from eggs and feed on the roots. Larvae then transform into pupae in the ground. There are usually one to two generations per year.

Treatment

Flea beetles are best managed through a combination of methods. Since they are most damaging in spring, you will need to monitor for leaf damage. If there is damage – treat immediately!!

When closing up your garden for winter you can remove old crop debris or till it into the soil so that beetles will not be able to get protection in the winter.

First step during growing season is if you think you have flea beetles and damage indicates flea beetles, try yellow sticky traps you can place in your garden to catch some.

Use row covers to keep beetles out while seedlings are growing. As the plants mature, remove the row covers before the flowers bloom.

Some advice is to plant a favorite crop, such as radish, as a “trap crop” so you can draw in the beetles and treat. I personally don’t do that. The way I see it is all you are doing in ringing a dinner-bell for the bugs.

Microctonus vittatae, a native braconid wasp, and tachinid flies kill the adult flea beetle. The larvae of this wasp develop on the female flea beetle and prevent the beetle from reproducing. To encourage these insects, plant flowers such as caraway, herb fennel and coriander as well as flowers such as poppies, marigolds and yarrow.

To control the larvae try using parasitic nematodes in your garden beds. Install them in beds just before planting crops. If the larvae can be controlled or killed, you can almost eliminate local populations.

You can also dust plants and surrounding soil with diatomaceous earth.

There are many pesticides labeled for treating flea beetles. Check with your nursery to put together a program

Notes of Interest

Other flea beetle species are beneficial, feeding on weeds and similar nuisance plants. A few species have even been introduced to various locations as biological control agents against some weeds. One important example is in the control of Leafy Spurge (Euphorbia esula), an invasive weed in the United States. It has a toxic latex and is generally avoided by herbivores. Flea beetles of the genus Aphthona have been successfully introduced to control this plant.

wild life recipes