Category Archives: Uncategorized

Squash Apple Soup Recipe

Squash and Apple Soup

I do not grow butternut squash in my garden since it takes up a lot of space. However, there is a farmer about four miles away that sells butternut squash for $1.00 each. Every year I buy 10 or 20 for storage, roasting and freezing. This squash apple soup recipe happens to be one of my favorites. This recipe makes enough for several days of soup or enough to package and freeze. Unless you happen to have a pressure cooker, you should not try canning.

Ingredients

16 cups cubed seeded peeled butternut squash
2 large apples, peeled, chopped
2 large onions, cut into 1-inch pieces
4 tbsp. brown sugar
2 tsp salt
2 tsp ground cinnamon
1 tsp. pepper
6 cups chicken stock
1 1/2 cups heavy cream
12 oz fat free vanilla yogurt
4 tbsp. chopped fresh chives

Directions

To make squash apple soup start with: In a large pot, mix squash, apple, onion, brown sugar, salt, cinnamon and pepper. Add the chicken stock. Cover and heat over medium-high heat (so you don’t burn the squash) until the soup starts boiling. Reduce heat; simmer covered about 20 minutes or until squash is tender.

Using an immersion blender or food processor, blend until smooth (I like to have some chunks in my soup so I usually remove about 1/4 to 1/3 before blending. I add back after blending). Stir in heavy cream and yogurt. Heat over low heat, stirring occasionally, just until heated through. Ladle the squash apple soup into bowls; sprinkle with fresh chives.

As a substitute for butternut squash you can use yellow summer squash in the squash apple soup. The yellow squash meat is as tender and the skin of yellow summer squash is edible which makes baking and scrapping out the meat (as you do for butternut squash) not necessary.

Look at other squash recipes https://traderscreek.com/recipes/recipe-index/

Check our wildliferecipes.net

Freezer Slaw Recipe

Freezer Slaw Recipe

A simple easy to follow freezer slaw recipe. A great way to preserve cabbages from the garden. If you don’t have a garden, go to a local farmers market and buy some nice organic, non-GMO produce and make this recipe. As long as you have extra freezer space, freezer slaw is great. Cabbage is a great vegetable with plenty of vitamins.

Ingredientsfreezer slaw recipe is easy and is a great way to preserve cabbage from the garden

4 pounds cabbage
2 large green peppers
5 large carrots
2 onions – sliced
4 teaspoons salt

Dressing:

3 cups sugar – see directions
2 tsps. dry mustard or mustard seed
2 tsps. celery seed
2 1/2 cups apple cider vinegar
1 1/2 cups water

Cooking Directions

Simply shred cabbage, green peppers and carrots. Add sliced onions. Add 1 tsp. of salt per salt per pound of cabbage and mix well and let sit for 1 hour. After one hour, rinse and dry the cabbage.

In a pot add sugar, water, vinegar. mustard and celery seed and bring to a boil. Boil for 5 minutes. Turn off heat and let cool!!

Pour over drained cabbage and let set for 5 to 10 minutes. Stir well.

Package in freezer containers leaving about 1/2 inch head space. Will last for 8 – 10 months. When ready just remove from freezer and allow to thaw and serve.

When you have excess cabbage, make some freezer slaw. It is a simple vinegar based slaw recipe. I find it delicious and a great way to store the summers harvest. It freezes great and when thawed you would never think it was ever frozen. This is great when making fish tacos. I have made freezer slaw for several years now and consider freezer slaw a must do. I grow enough cabbage making sure to set aside five to six pounds for this great dish.

Look at other cabbage recipes https://traderscreek.com/recipes/recipe-index/

try recipes from wildlife recipes

Mediterranean Green Beans

Mediterranean Green Beans

To make good Mediterranean green beans pick your beans early when they are young, thin and have not yet started forming seeds. When made correctly and served chilled, this is a great fresh salad for a summer meal. The Kalamata olives add a twist to the taste. Even if you do not like these types of olives, given them a try. The salty “different” flavor really plays well with the rest of the dish.

Ingredients:

1/3 cup of chopped pitted Kalamata olives
1 large shallot – sliced. Use a shallots here and not onions. If need be green onions or scallions can be used.
2 tbsp. red wine vinegar
2 tsp. whole grain mustard
3 tbsp. of chopped walnuts – sliced almonds also work well
½ tsp. of sugar
3 tbsp. of extra virgin olive oil.
1 lb. of fresh young green beans
¼ cup of feta cheese

Directions:

Combine all ingredients other than the green beans and feta cheese. Stir together. Bring a pot of water to a boil and drop in the green beans. Cook for approximately 5 minutes. Use a ladle or spider and take out the beans and place immediately in ice water to stop any cooking. Once cool add the beans to the other ingredients and top with the feta cheese. Enjoy!!

When the summer garden is in full swing and the green beans are coming in fast, try making Mediterranean green beans for a change. Whether with a burger, sandwiches or a steak Mediterranean green beans add that extra touch and interesting taste.

Back to green bean recipes

Try wildlife recipes

Sauteed Green Beans Recipe

Sauteed Green Beans Recipe

Sauteed Green Beans are easy to make and add a great side dish that will make everyone happy. Try this Sauteed Green Bean recipe and you will make it again and again.

Ingredients

2 cups green beans, trimmed
1 tablespoon butter
1/4 cup almonds, slivered or sliced
1 tbsp chopped chives – dried (I have used both dried and fresh from the garden and frankly I like to used dried chives here)
Salt and ground black pepper to taste

Directions

In a skillet, saute the green beans in butter until tender-crisp. Make sure to turn the green beans or they will burn. Season with salt and black pepper to taste. Be careful not to go too heavy on the salt. Once the green beans are tender, add the almonds to the skillet and heat through until the almonds are toasted. At the last minute or two add the dried chives. Serve with any meat (pork tenderloin or a good sirloin is my favorite here) and a red wine or beer.


Back to green bean recipes

Salsa Recipe

Salsa Recipe

Making this salsa recipe is easy when your garden is in full swing. Most of the ingredients are vegetable garden staples – tomatoes, peppers, onions, garlic, spice, etc. This recipe allows you to either can or refrigerate your salsa. Once you have this basic salsa recipe down – improvise and try to make it your own. You can even combine the ingredients in a large bowl and use fresh without any cooking.

What you need – Kitchen supplies

Pot large enough to use as a canner
canning jars
canning seals and rings
jar lifter
canning funnel
large pot
bowls
large spoons
sharp knife
towels and dish cloths
ladle

Ingredients

10 cups chopped cored peeled tomatoes (about 25 medium)
5 cups chopped seeded green bell peppers (about 4 large)
5 cups chopped onions (about 6 to 8 medium)
2-1/2 cups chopped seeded chili peppers (about 13 medium)
1-1/4 cups cider vinegar
3 cloves garlic, finely chopped
2 Tbsp finely chopped cilantro
1 Tbsp salt
1 tsp tobasco sauce

Directions:

Fill a large pot about 1/2 full and place on high heat.

Heat jars and lids in simmering water until ready for use. Do not boil. Set bands aside.

Combine tomatoes, green peppers, onions, chili peppers, vinegar, garlic, cilantro, salt and tobasco sauce, in a large stainless steel saucepan. Bring to a boil over medium-high heat, stirring constantly. Reduce heat and boil gently, stirring frequently, until slightly thickened, about 10 minutes. You have just made a nice salsa. If you want, refrigerate and use as you like.

For canning:

Ladle hot salsa into hot jars (use a funnel it keeps things clean), leaving about 1/2 inch head space. Stir each jar with a clean knife to remove air bubbles and adjust head space, if necessary, by adding hot salsa. Wipe rim. Center lid on jar. Apply band until fit is fingertip tight.

Process both pint and half pint jars in a boiling water bath for 15 minutes, adjusting for altitude. Remove jars and cool. Check lids for seal after 24 hours.If the lid pops it isn’t sealed and the jar should be placed in the fridge and used within 2 weeks.

Dilly Beans Recipe

Dilly Beans Recipe

What you need – Kitchen supplies

water bath canner
canning jars
canning seals and rings
jar lifter
canning funnel
large pot
bowls
large spoons
sharp knife
towels and dish cloths
ladle

Ingredients

Green Beans – enough to make 4 pints or about 2 pounds
2 tsp of dill seed
4 cloves of garlic
1/4 cup canning salt
2 1/2 cups vinegar
2 1/2 cups water
1 tsp cayenne pepper
1 tsp of alum

Directions

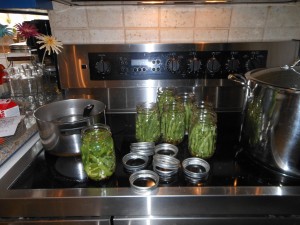
dilly beans are easy to make but include a lot of timed stepsDilly beans are basically a pickling process. Below is the “soup-to-nuts” to take beans from the garden and pickle them into dilly beans that can be enjoyed for up to 1 year.

Process your green beans – wash beans – snap off ends and snap (break or cut) to jar length. If there appears to be “strings” on the beans – pull them off.

Sterilize your jars and lids. Put 1/2 tsp dill seed and 2 cloves of garlic and 1/8 tsp cayenne in each jar after sterilized.

Pack the jars firmly with processed green beans and, leaving 1/2-inch space from the top of the jar.

Combine -vinegar, water and salt to make the pickling solution or brine. Bring this to a boil.

Turn the heat off your brine and when bubbling stops add the alum and stir.

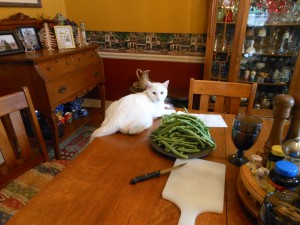
Ladle the brine over the beans. Fill the jars so that the liquid covers the beans but leave just enough head space (about a ¼ – ½ inch) at the jar top to allow for expansion when processing in the hot-water bath. Use a knife and gently stir each jar to remove any trapped bubbles.Boo the cat likes to participate in cooking activities

Process the jars in a canning pot for 8 minutes if under 1,000 FT or 10 minutes from 1,000 – 6,000 FT. Remove and allow to cool, making sure the jars have sealed by pressing on the lid. If it pops up the lid isn’t sealed and should be placed in the fridge and used within 2 weeks.

Dilly Beans will be ready to eat within a week and are good for about a year.


Back to green bean recipes

Find canning supplies at Ball Co.

Look at other green bean recipes https://traderscreek.com/recipes/recipe-index/